However, I did think I might concentrate on that side of things in this post.
It will mean using examples from the past which some of you will have already seen, so I apologise for that.
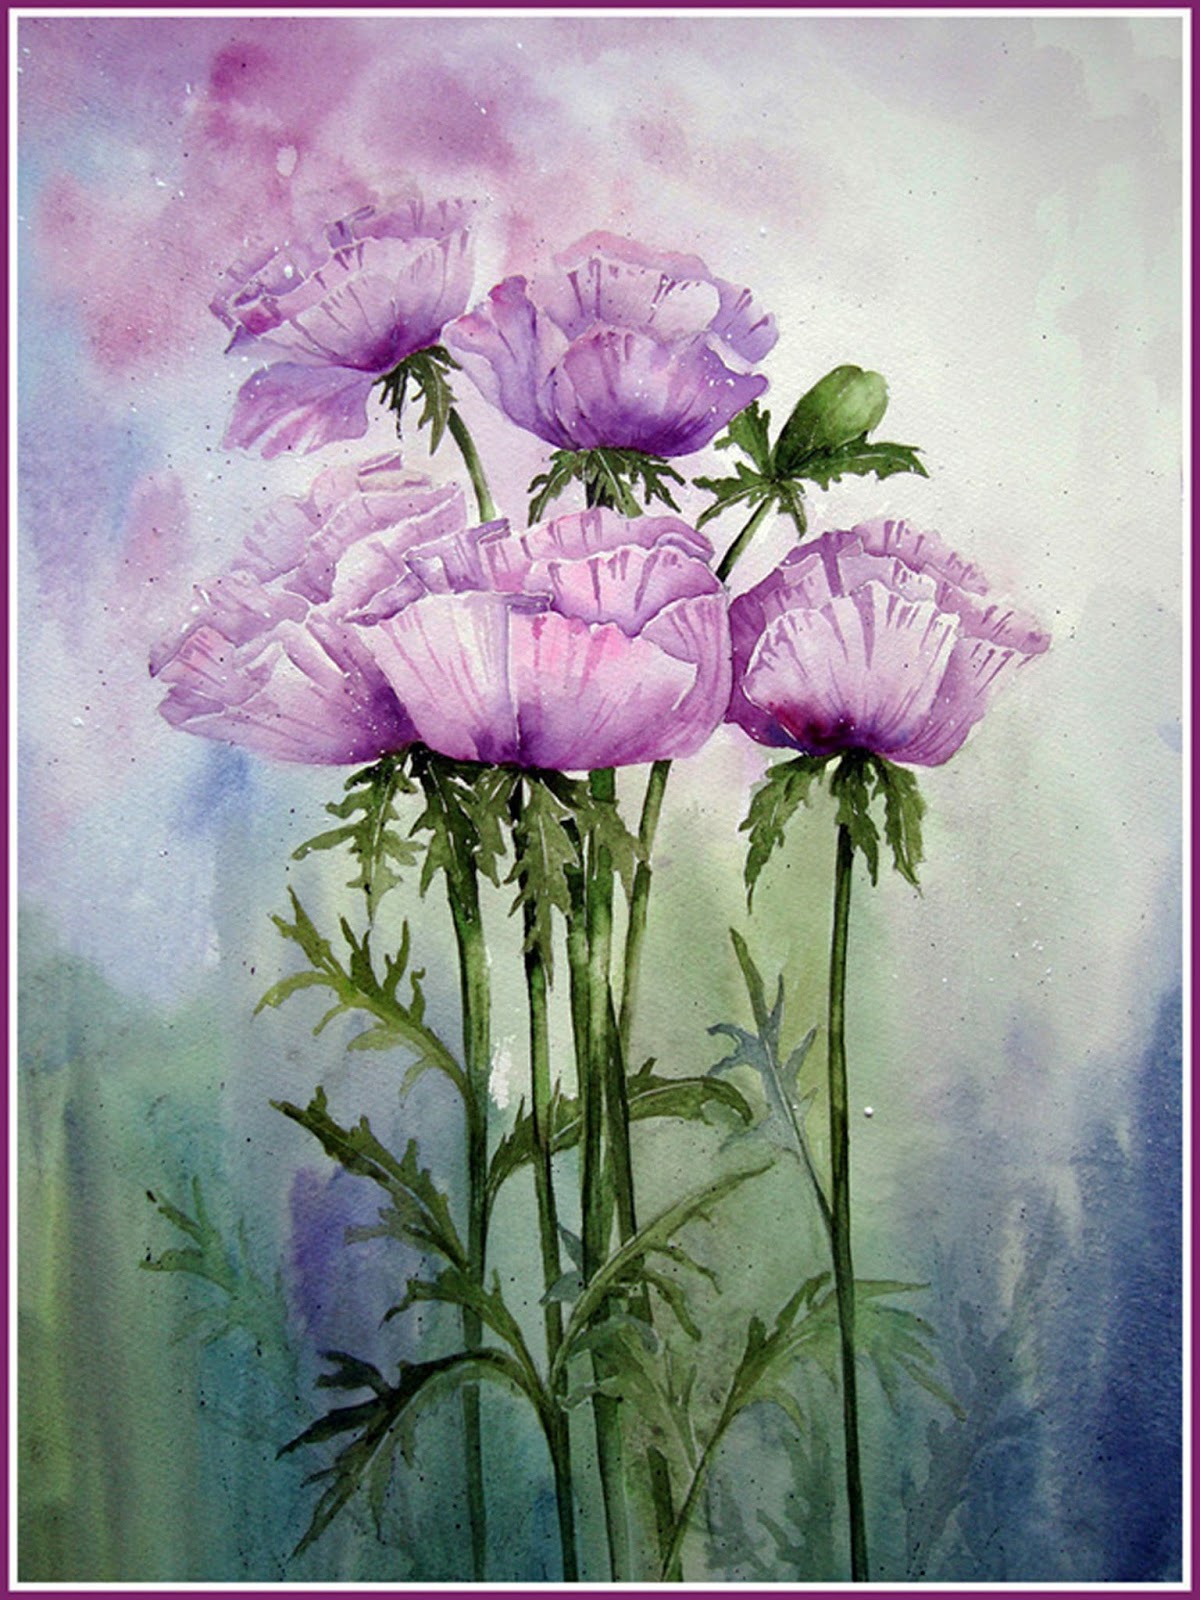
I have two main ways of going about the background. Either traditionally painting the subject first and then adding the background afterwards. I usually use this process if I am painting larger specimen flowers or still life objects. It means that it is easier to retain the white paper within the object....usually flowers, of course, and I can control the composition better as I can place the blooms where I want them.
This process usually leads to a much tighter painting, and quite a bit of anxiety, if I feel that the flowers have worked really well and have been time consuming. It is easy to fear wrecking it all with the background.
I have recently finished two paintings in this way.


In both these paintings, I did a careful drawing first, and painted all the significant blooms and leaves. I used masking fluid for stamens where necessary, and painted those areas first so that the masking fluid could be removed as quickly as possible. It is not a good idea to let it sit there too long as it can remove the paper surface when you try to lift it off.
I paint the flowers right up to the pencil line but not over it, which allows me to erase the pencil once the paint is totally dry.
When I am ready to paint the background, I decide on the colours......in these paintings usually greens and browns to replicate their growing position. I do however, nearly always add patches of the flower colour to maybe hint at further flowers in the distance.
To add the paint, I try to let the mixing happen by itself on the paper, starting by filling the smaller spaces in the middle with darks and adding lighter tones as I move outwards. So it is simply a case of wetting each area, and adding colour from a well laden brush, and dropping it onto the wet paper. by dropping in a couple of colours and leaving it to do its thing, there are rarely hard edges. I do use a soft tissue to dampen the edges if necessary so that there are no lines of division as I proceed to the next area.
I usually increase the intensity of colour in the corners, especially at the base, and frequently use a similar colour to the flowers in one of the top corners to bring some light into the painting. As I will use a big brush for the large areas, I keep a small brush handy to push the paint into the tight corners between stems, leaves and petals. I also make sure that there is colour continuity when the background is interrupted by, say, a stem. For me , it is important that areas on both side have the same colour to make it look natural.
If there are any poor areas, these can be rectified by gentle addition of a second wash when the first is dry, and areas can be gently washed out, or the addition of extra leaves etc, left slightly fuzzy to indicate further back.
That's about it, really. It does need a bit of practice, but it is important to take it slowly, think about it and test the colours before adding to the painting especially if the subject has taken time and effort and has worked really well.
If I am painting a subject with lots of small elements, or I want a looser finish, I will paint the background first. It is really quite a simple job of wetting the paper, and dropping the colour onto the wet surface. The problem is that it is less easy to control and you can lose the white of the paper, so I often use White acrylic gouache to recover them.
I try to imagine where the flowers are going to go, and usually make the background darker on the left hand side. I blot out some of the edges and often add a few paint lines in one or other direction to help with the looseness.
I have to think carefully where the flowers are going to sit in the painting, and have to be quite flexible as the composition depends quite a bit on the results of the wash.
Then the process is very much the same for the actual drawing and painting of the flowers. This method enables me to much more easily include lost and found edges and to paint shadowy distant flowers in the background


When the painting is complete, I can add more pigment to any of the background areas that I think need more strength and can use the gouache to soften any edges I want to partly remove.
Both methods work well, it just depends on my mood, my subject and my image in my head as to what I want it to look like.
I hope those readers that have asked me to talk about my backgrounds have found this helpful, and that other followers of the blog have enjoyed reading it and found it interesting.
There are lots more examples, and photos in previous posts to browse if you want more details.